FBX Quick Help
How to Record


Just play as usual…
If you don’t see the overlay, then FBX can’t record the game. We’ve tried to make it compatible with a really wide range of games, but you might find one – usually an older game – that doesn’t work. Take a look at our Support page.
Hit the same hotkey again to stop recording and you’ll see the ‘Saved’ confirmation:

When you stop recording:
- FBX creates a new movie in the Recording tab – look at the help on this page for “Your Recordings”.
- It saves the recording as an MP4 file to the ‘FBX Recordings’ folder in your Videos library.
While recording you can hit hotkeys to:
- Save a Clip – the previous few seconds of gameplay – (F10 by default)
- Save a screenshot (Print-Screen key by default)
- Pause the recording (F8 by default)
- Add a marker, so you can find that point in the movie again easily – (Alt+C by default)
- Mute the microphone (Ctrl+T by default)
Recording Sound
In FBX, go to Settings -> Audio to set the sources to record and how loud they should be.
FBX can record two sources simultaneously, the Game or PC Sounds and the microphone. By default it just records the Game sounds – not any other sounds you might hear, like a discord chat or music.
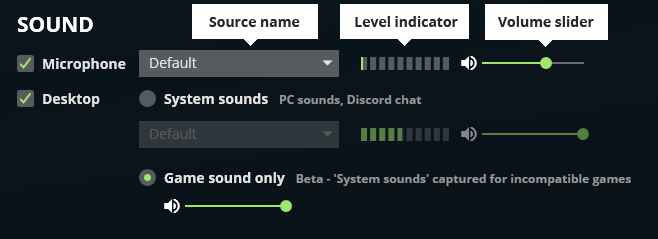
If the game volume is a lot louder than your commentary, use the Game volume slider to reduce its volume.
Recording a Webcam
FBX won’t record your webcam by default. To record it go to the ‘Webcam’ tab and turn on the ‘Record webcam’ option.
To set the size and position of the webcam window in your recording:
- Click the blue ‘Preview webcam and set position and size’ link.
- A small webcam window will appear. Click and drag to set its size and position. This sets where it will appear in your recording.
Other settings:
- Source – select the webcam to record, if you have more than one.
- Show webcam while recording – if this is ON you’ll see the webcam image on your screen while recording. If you want to hide it, turn this setting OFF.
- Rotate 180 degrees – some webcams, on Windows 10, rotate their image 180 degrees. Turn this setting ON only if your webcam makes a rotated image.
- Opacity – slide this to reduce the opacity of the webcam window. If you want to appear in the recording, but not too much.
Your Recordings
Select the Recordings tab in FBX to see the recordings, screenshots and clips you’ve saved.
From here you can:
- Play videos
- Upload them to Youtube
- Get an MP4 file
- Go into the editor, where you can add effects, make a GIF or cut the recording down to a smaller clip.
In the top left corner, there are 2 tabs to show your captures by date or by game:

Above the movie are some features:

- Edit Video – opens the editor, where you can add things, save a GIF or cut a short clip out of the movie.
- Export MP4 – click this to get an MP4 video file of the whole movie.
- YouTube – upload the whole movie to Youtube.
Recordings and clips are saved as MP4 files into the folder ‘FBX Game Recorder/Recordings’ in your Video library by default, but you can change the folder by going to Settings tab and selecting Options -> Folders
You can limit the disk space used by recordings by going to Settings -> Options -> Folders and clicking the ‘Change’ button for recording folder size limitations.
Performance
Some settings affect FBX’s performance when recording.
You can find these in the Settings > Video tab.
- Encoder
Hardware encoders have faster performance than software ones. FBX will select a hardware encoder by default if available, so you should only select a software encoder if you’re experiencing problems. - Frames per second
The higher the frames per second (FPS) the more resources FBX needs. You might improve in-game performance by reducing the FPS setting – not every game needs to be recorded at 120 or 144 FPS. - Resolution
By default FBX will make recordings with the same dimensions as the game. You can increase performance by selecting an option other than ‘Original’, to reduce the size of the recording.
FBX lets you save any part of a movie as a short clip.
How to save a clip from a movie
In the Recordings tab, you’ll see an Edit Video button to the right of the Date and Game tabs:
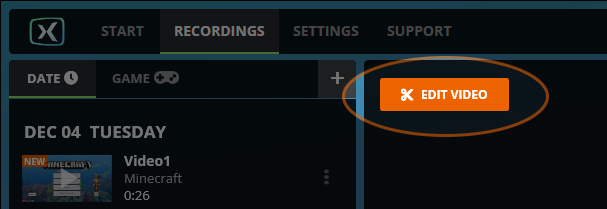
Click that to open the Editor
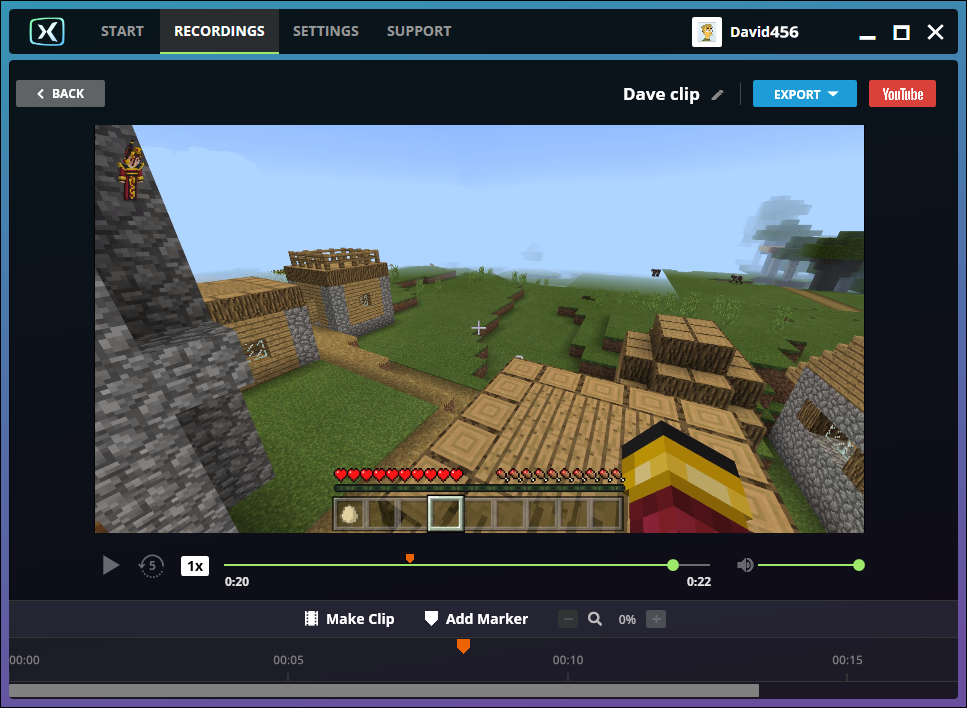
Find the point at which you want to start the clip, then click ‘Make Clip’.
FBX will make a selection for you in the Timebar at the bottom of the window.

This selection is the part of the movie you’ll save as a clip. Change the start and end by dragging the green handles.
When you’re ready, click OK on the popup above to save the clip as a new movie in the Recordings list.
To return to the Recordings list, click the Back button or the Recordings tab at the top of the window.
To add effects you need to be in the Editor. To open the Editor, click the ‘Edit Video’ button:

Slow-Mo
Slow it all down and let your viewers get a better look at the action with Slow-mo.
Click ‘Slow-mo’ in the left side menu:
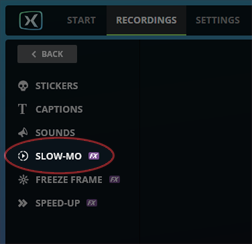
FBX will make a green selection on the timeline – you’ll apply slow-mo to that selection.
Adjust the start and end and when you’re ready, click Apply. And there you go – the action is slooowed down.
To undo the Slow-mo, click the Undo button.
Speed-up
To skip through the build-up and get to the action, use Speed-up.
Click ‘Speed-up’ in the left side menu:
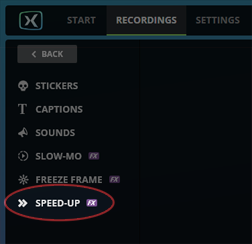
FBX will make a green selection on the timeline – you’ll apply the speed-up to that selection.
Adjust the start and end and when you’re ready, click Apply. And there you go – the action is speeded up!
To undo the speed-up effect, click the Undo button.
Freeze Frame
FBX lets you freeze the action so we can get a better look.
Click ‘Freeze frame’ in the side menu:
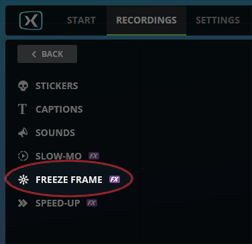
Then select the frame you need frozen and click the blue ‘Add FX’ button.
Add stuff to videos to tell us what’s going on, mock your enemies, big up your glorious victories!
Stickers | Captions | Sounds | Using the Timeline | Pausing the video | Making an Overlay
To add stickers, sounds and captions you’ll need to be in the editor. Open the editor with the ‘Edit Video’ button:

Stickers
The right sticker is worth a thousand words. To add a sticker, click ‘Stickers’ in the left side menu and drag a sticker into the movie.
Once you’ve done that, you can drag it around and resize it. Rotate it with the handle on the top, delete it with the ‘X’ button on the bottom.
Click ‘Upload Images’ to add your own images to the list. PNGs, JPGs, and animated GIFs are supported.
Change the duration or start of a sticker on the Timeline.
See how to pause playback while its displayed.
Captions
Tell it like it is. To add a caption, click ‘Captions’ in the left side menu and drag one of the caption styles into the movie.
Once you’ve done that you can change how it looks using the options in the left side panel, drag it around and resize it. Rotate it with the handle on the top or delete it with the ‘X’ button on the bottom.
Change the duration or start of the caption on the Timeline.
See how to pause playback while its displayed.
Sounds
To add a Sound, click ‘Sounds’ in the left side menu, find the sound you want and click its ‘Add’ button.
Click ‘Upload Sound’ to add your own sounds to the list. WAV, MP3 and AAC files are supported.
Change the duration or start of the caption on the Timeline.
The Timeline
The panel at the bottom of FBX’s window shows the Timeline. This is where you:
- Change the duration and start frame of stickers, sounds and captions.
- Select frames to apply effects to.
Click an object to select it. It will be outlined in green:
![]()
You can change when it appears by dragging the object or dragging its left handle. Change how long it appears for by dragging the right handle.
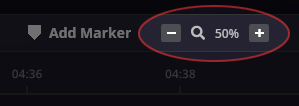
Zoom in and out of the timeline using the zoom control above it:
Pausing the Video While an Object is Displayed
You can pause playback while a Sticker or Caption is displayed by turning on the ‘Pause Video’ option:
![]()
Making Overlays
If you want to display a Sticker or Caption for the entire duration of the video (e.g. your logo, or a ‘Please subscribe’ message), turn on the ‘Make Fixed Overlay’ option:
![]()
You can use hotkeys to activate these functions while recording:
- Pause and restart recording (default F8)
- Save a clip (default F10)
- Save a screenshot (default Print-Screen)
- Add a marker (default Alt+T)
- Mute the microphone (default Ctrl+T)
To change the hotkeys, go to Settings -> Hotkeys. Place the cursor into the input for the hotkey you want to change and press the new key combination. You’ll see the new hotkey in the input. However, if the input goes blank, this means FBX couldn’t use that hotkey – some other application may have reserved it already.
Exporting an MP4
Go to the top right of the FBX window and click the ‘Export’ or ‘Export MP4’ button. You’ll be asked where to save the file and what its name should be.
Exporting a GIF
You can save part of the movie as a GIF. To do this you need to be in the Editor – open it by clicking the ‘Edit Video’ button:

Find the part of the movie you want to save as a GIF, and click Export -> GIF
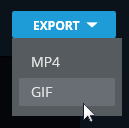
If you want to save just part of the movie, select ‘Selected Frames’ in the Save option in the Make GIF window. FBX will make a selection for you in the Timeline:

This selection is the part of the movie you’ll save as a GIF.
Change the start and end by dragging the green handles, but remember – GIFs usually play for only a few seconds, because if they’re longer the file can get large and take too long to download.
Set the options, if you need to:
- Save – you can set this to save the whole movie or just the frames you’ve selected
- Frame Rate – the higher the frame rate, the smoother the action, but the larger the file.
- Resolution – the size of the GIF.
And click Save to save a GIF file.
Sharing the Movie to Youtube
Go to the top right of the FBX window and click the ‘Youtube’ button.
If its the first time you’ve used the function you’ll see the Youtube/Google login page where you’ll need to enter your password – FBX needs your permission to upload to your account.
After that you’ll type the video title and description, set its sharing option (private, public, unlisted), click Upload to share the movie.
Markers
Markers help you find the interesting bits of the recording again. You can add markers while recording, or add them afterwards in the Editor.
How to add a marker while recording
Just use the hotkey. By default this is Alt-C.
Get into the editor by selecting the movie in the Recordings tab and clicking the Edit Video button:

Then find the point you want to mark and click ‘Add Marker’. That’s it.
Jump to a marker by clicking it. Markers are displayed with this icon ![]()
In the Captures tab:

And in the Editor:

Clips
Press a hotkey (default F10) to save the previous few seconds to a separate movie. You have to be recording to do this.
To set the number of seconds to save in the clip, go to Settings > Options.
Cursor Recording
Do you want to record the mouse cursor or not? FBX tries to guess which games need this, but if it’s got it wrong, go to Settings > Options and select ‘Record the cursor’ or ‘Don’t record the cursor’.
Switching away from the game
What do you want FBX to do when you switch away from the game? It can pause recording (and continue when you switch back), stop, or carry on recording the game (not whatever you’ve switched to). Set this option on the Options tab in the Settings.

